
How to Build a Concrete Sleeper Retaining Wall: Step-by-step Guide
Table of Contents:
Knowing how to build a concrete sleeper retaining wall step by step is crucial, because building a concrete sleeper retaining wall is one of those jobs that looks easy until you start digging.
Done right, concrete sleeper retaining walls last forever and need bugger all maintenance. But there's more to it than chucking some sleepers between posts.
You need proper structural engineering, drainage sorted, and local council happy with what you're doing.
Step 1: Pre-construction Planning and Compliance
Understand Local Council Regulations
First thing, check your council approval requirements and whether you need a building permit or structural engineer.
Most places in Australia, anything over 1.2 metres needs paperwork.
That's measured from the bottom of your footing to the top of the wall, not just what you can see above ground.
Got a driveway above it? On a slope? Supporting something heavy? Standard designs won't cut it, you'll need an engineer to confirm it's safe.
Remember, that innocent looking 1 metre wall might actually be 1.5 metres once you count the footings. That's when council gets interested.
Site Investigation and Preparation
Once compliance is sorted, check for underground services. Don't want to hit gas or water lines. Mark out your wall using pegs and string line to keep it straight.
Work out where your steel posts go based on your sleeper lengths. Using 2 metre sleepers? Your holes need to be about 2.01 metres apart for clearance.
Get this wrong and nothing fits properly. Small mistakes here lead to big problems later.
Budgeting and Cost Planning
Concrete Sleeper Retaining Wall Cost can vary, but the investment is worth it for strength and longevity.
Depending on height, soil conditions and engineering needs, prices vary heaps.
Supplies only, you're looking at maybe $130 to $195 per square metre.
Sleepers around $90 to $125, galvanised steel posts $30 to $50, drainage and backfill another $10 to $20.
Getting someone to build it? Usually $300 to $450 per square metre.
Don't forget engineering fees, council costs, and if your site has crap access, that'll cost extra too.
Look, this is where you plan properly or pay for it later. Contact a few suppliers, get quotes. Measure your area twice.
Choose materials that suit your location. DIY saves money but only if you know what you're doing. Purchase quality gear. Prepare to put in the work.
Pour footings properly. Set your posts right. Take your time. Install with care. Provide proper drainage or watch your wall fail.
Place everything level. Build it once, build it right. Step by step gets the job done. From start to completion, commitment matters.
Step 2: Materials and Structural Components

Concrete Sleeper Specifications
Standard concrete sleeper sizes for retaining walls are usually 80mm thick by 200mm high, offering greater durability when comparing concrete sleeper retaining walls vs timber options. Lengths run from 1.2m up to 3.0m.
For structural work they need reinforcing, usually 2 or 3 N12 steel bars inside, and concrete strength of 40 to 50 MPa minimum.
Your sleepers can withstand soil pressure without cracking, which gives them a clear advantage when comparing concrete sleeper vs block retaining walls for long-term stability.
Steel Posts and Corrosion Protection
Steel posts are what hold everything up. Straight walls use H section posts.
Corners or ends might need C sections or corner joiners at 45 or 90 degrees.
Get structural steel, Grade 300 usually, and make sure it's hot dip galvanised to HDG600 standard.
That's what stops them rusting out, even near the coast or where it pisses down all the time.
Engineering Dimensions and Foundation Requirements
The relationship between wall height, post spacing, post size and footing depth isn't simple. Here's what actually works:
1.2m wall needs 100UC14 post with 300mm diameter holes bored 1.25m deep.
2.0m high wall? You're looking at 200UB22 posts with 450mm footings down 2.15m or deeper.
Pour wet concrete, N25 strength minimum, and let it cure properly before loading anything.
These foundations provide the cantilever action that keeps sleepers in tension and stops your wall falling over.
Step 3: Construction Process

Excavation and Footing Preparation
Start digging bored piers for steel posts at your predetermined centres. Get the diameter and depth right, usually 300 to 450mm wide and 1.25m to 2.2m deep depending on height.
While you're at it, prepare the base trench for the first sleeper. Make it level, compact it, clear out loose scrap.
Setting and Aligning Steel Posts
Install posts into the bored holes, line them up with your string line to keep the wall straight. Spirit level or laser to check each post is plumb.
Once aligned, pour wet mix concrete around the post, maintain proper cover, let it cure minimum 48 hours before doing anything else.
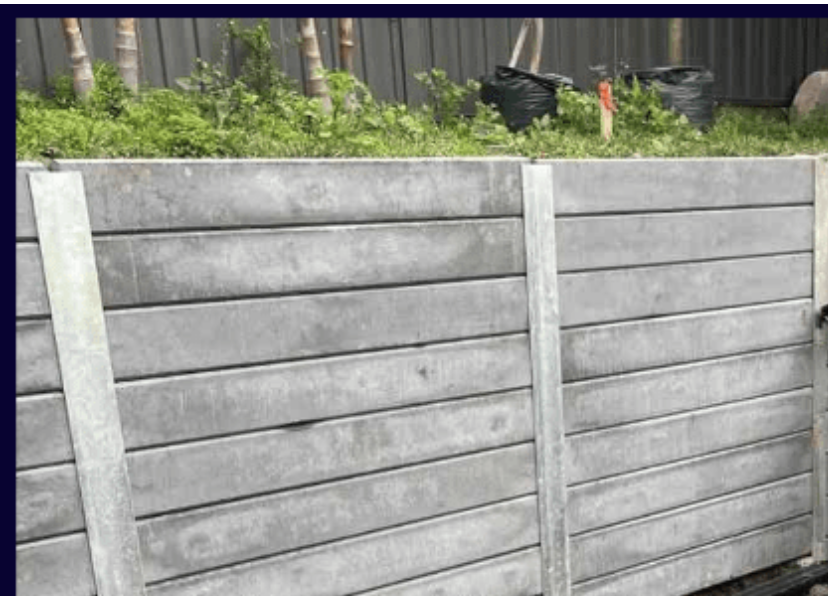
Installing the Concrete Sleepers
After footings cure, lay gravel bed for first course of sleepers. Place each sleeper between posts, making sure everything's level and aligned.
There's a 10mm gap between sleeper ends and post flanges for installation.
Wedge timber packers in this space to prevent movement until the backfill secures it. Stack courses like this until you hit desired height.
Finishing and Capping
For professional finish, cap the wall with capping sleeper or preformed concrete cap. Looks better and protects the top edge.
Make sure all visible courses are level, joints equal for uniform appearance. Right, that's your basic build.
Remember this job needs commitment. Contact local council first. Structural engineer if needed.
Choose right materials for your location. Measure twice. Plan access for machinery if it's crucial. Good advice beats learning the hard way. Proper drainage is relevant to effectiveness.
Small things matter in the end. Set everything right first time. Confirm regulations apply to your area. Options vary but stability comes from doing it properly.
Step 4: Drainage and Backfilling

The Importance of Proper Drainage
Even a solid sleeper wall will fail if drainage is stuffed. When soil behind the wall gets saturated, water pressure builds up and can crack, bow or collapse the whole thing. The walls meant to hold soil, not swimming pools worth of water.
Installing the Drainage System
Bottom of the wall, chuck in perforated ag pipe in the trench behind the first sleeper row.
Pipe needs a fall so water runs to an outlet. Surround the pipe and space behind the wall with coarse gravel or shingle, nearly to the top but leave 150mm for topsoil.
Before the gravel goes in, stick geotextile fabric against the back of the sleepers. Stops fine soil clogging up your drainage.
Weep holes help too, especially for walls over 1.2m or where it rains heaps. Small openings every 1.8 to 3 metres let trapped water out.
Backfilling and Final Grading
Compact drainage aggregate in layers so it doesn't settle later.
Top 150mm gets quality topsoil, compacted and graded so ground slopes away from the wall. Surface water runs away, not towards your structure.
Step 5: Quality Control and Safety

Common Mistakes to Avoid
Most retaining wall failures come from ignoring basics. People dig footings too shallow.
Dry pour concrete instead of wet. Skip proper drainage. Get post spacing wrong. Mix sleeper lengths causing misalignment.
Don't get soil tested or structural engineer involved when they should.
Safety Tips and Best Practices
Concrete sleeper weights are no joke, often over 100kg for longer ones. Use team lifts or machinery.
Brace excavation holes in dodgy soil. Everyone wears steel caps, gloves, safety glasses. Work safe throughout.
Conclusion
Building a concrete sleeper retaining wall is possible for skilled DIYers or landscapers.
Just keep three key points in mind: know the regulations and engineering, ensure proper foundation depth, and create a good drainage system.
Follow each step from plan to completion and you'll get a retaining wall that's durable, compliant and looks good for years.
Look, this job needs doing right. Contact local council about permits. Get advice from pros.
Choose right materials. Measure everything. Prepare your site. Install with care. Build to last.
Frequently Asked Questions
-
Yeah, in most of Australia, anything over 1.0 to 1.2 metres from footing base or carrying a surcharge needs a building permit. And a structural engineer certification. Local council doesn't mess around with this stuff.
-
Wall gets higher, everything gets bigger fast. 2.0m wall might need 200UB22 steel section with 450mm bored pier over 2.1 metres deep. That's serious digging.
-
Holes centres match sleeper lengths plus clearance, usually 10mm extra. So 2.0m sleepers need centres about 2.01m. Get this wrong and nothing fits. Measure properly, it's crucial for structural integrity.
-
When water becomes trapped, hydrostatic pressure builds behind the wall and can exceed design limits. If drainage is ignored, even strong materials may fail. A system including AG pipe, coarse backfill and geotextile is essential.
-
Not checking boundaries. Skipping engineer when needed. Mixed sleeper lengths. Bad drainage. Dry pour concrete. Footings too shallow. Any of these will wreck your wall.
-
Concrete sleepers resist rotting, termites can't harm them, and weather is irrelevant. They require almost no maintenance. Last 50 years easy. Timber might be cheaper upfront but needs replacing way sooner.
-
Build it right with proper engineering and drainage, concrete sleeper retaining walls last 50 to 60 years minimum. Often longer with basic maintenance.
-
Under compliance height with simple site conditions? DIY is doable. Taller walls, surcharge loads, dodgy soil? Get a qualified contractor and structural engineer. Not worth the risk.
-
Check for movement regularly. Keep drainage clear. Clean out weep holes and backfill. Fix minor cracks if they appear. That's about it. Pretty low maintenance really.
Effectiveness comes from doing things right. Commitment shows in the end result, especially if you understand how to build a concrete sleeper retaining wall step by step.

Greg Hair, owner of Slide Living, has over a decade of experience in delivering high-quality landscaping and outdoor living solutions across Albury-Wodonga and surrounding regions.
Known for his attention to detail and great customer care, Greg has transformed hundreds of properties, specialising in everything from fencing, decking and home irrigation.
SLIDE Living is fully licensed and insured, ensuring top-notch workmanship and customer satisfaction on every project.